
Instructions for creating encrypted disk images can be found on the following Apple page. Note that the specific instructions are near the bottom of the page in the section "Create a secure disk image"
How to create an encrypted disk image on a Mac, as an encrypted container for files.
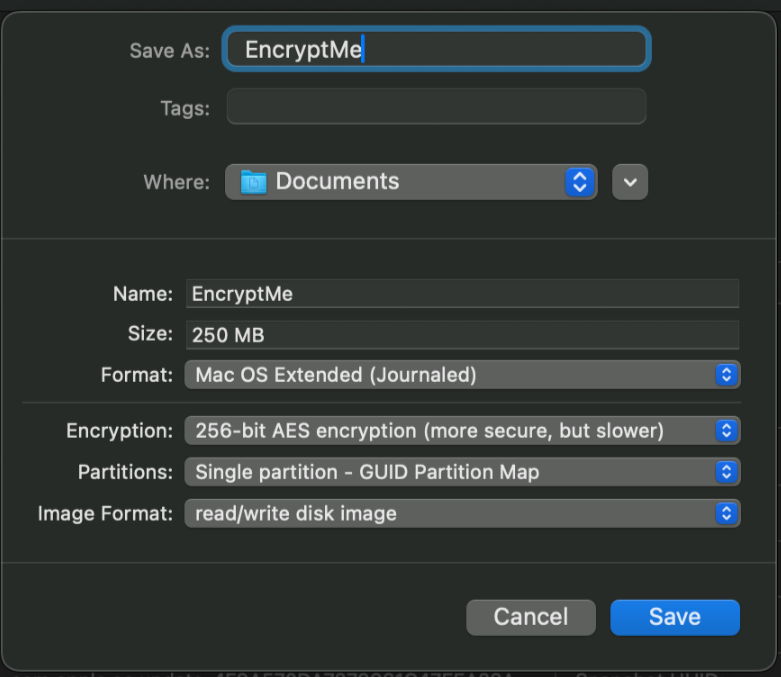
The encryption should be set to 256-bit AES encryption as seen below, and the password should be strong. It is important to remember the password you use for the disk image as without it the image will not be openable.
Related Links
This article was published on